
How to Install Motion Sensor LED Stair Lights Kit?
A motion sensor LED stair light kit has four parts: LED strips for the steps, a stair light controller, two PIR or motion sensors, and a 12V power supply. Install it in this order:
- Step lights: one LED strip under each stair tread, in an aluminum channel or directly on the step, each wired to the matching numbered output on the controller (step 1 to output 1).
- Sensors: one PIR or motion sensor at the first step and one at the last step, on the controller’s two sensor inputs.
- Power: connect the controller to the power supply without reversing positive and negative, then plug the supply into the wall outlet.
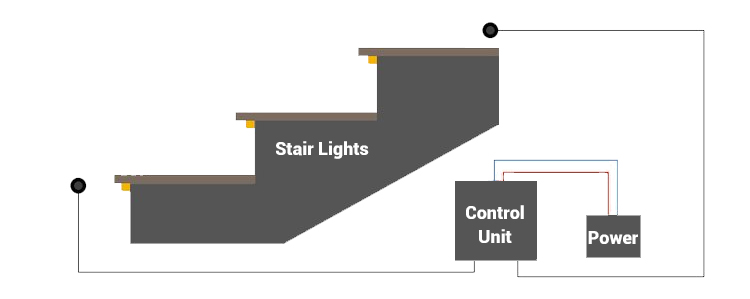
The LED stair light ES32 controller supports 32 steps. See the stair light wiring diagram and the seven installation steps below.
We have released a new indoor stair lighting - LED motion sensor stair light kit as the staircase accent lighting when you walk up and down in the dark. Here you can get the related complete products, including LED strips, aluminum channels, LED stair light controller with two motion sensors or PIR sensors, and LED power supply with an AC plug, convenient for you to use to the greatest extent.
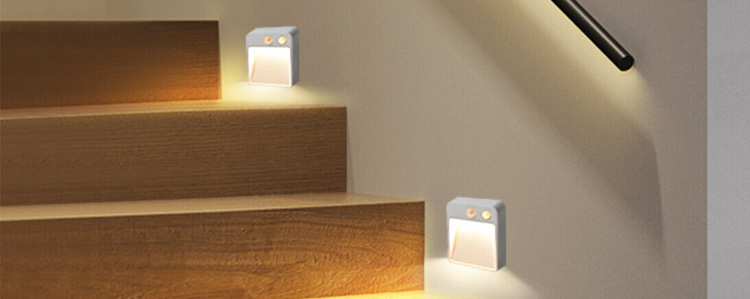
You can install the LED strip lights under stairs lighting treads, or on the stairs railing and the stair wall. As the steps lights, you will get a stepping or a flowing lighting effect with you up and down stairs.
Installing the single color LED strip lights in the stairs can get a stepping lighting effect, like it is welcoming you. It can be white light or be colorful light.
The flowing lighting effect of the step lights requires the use of the addressable LED strip. For addressable LED strips, we are recommended to supply power separately.
*Stepping lighting effect: the single color LED lights automatically light up from the first step to the last step and then automatically turn off. Both ends go up and down the stairs at the same time, the stepping lights will light up from the two ends of the stairs to the middle and then disappear. Please refer to the LED stair light controller manual for the specific stairway lighting effect. *Flowing lighting effect: the addressable LED lights flow from one end of the stairs to the other. |
Here’s the step-by-step guide to how to install the LED motion sensor stair lights.
At SuperLightingLED we put together stair light kits for customers every week. Below you will find what comes in the kit, the stair light wiring diagrams our engineers draw, and the seven installation steps, using the ES32 controller as the example.
What’s in a motion sensor LED stair light kit
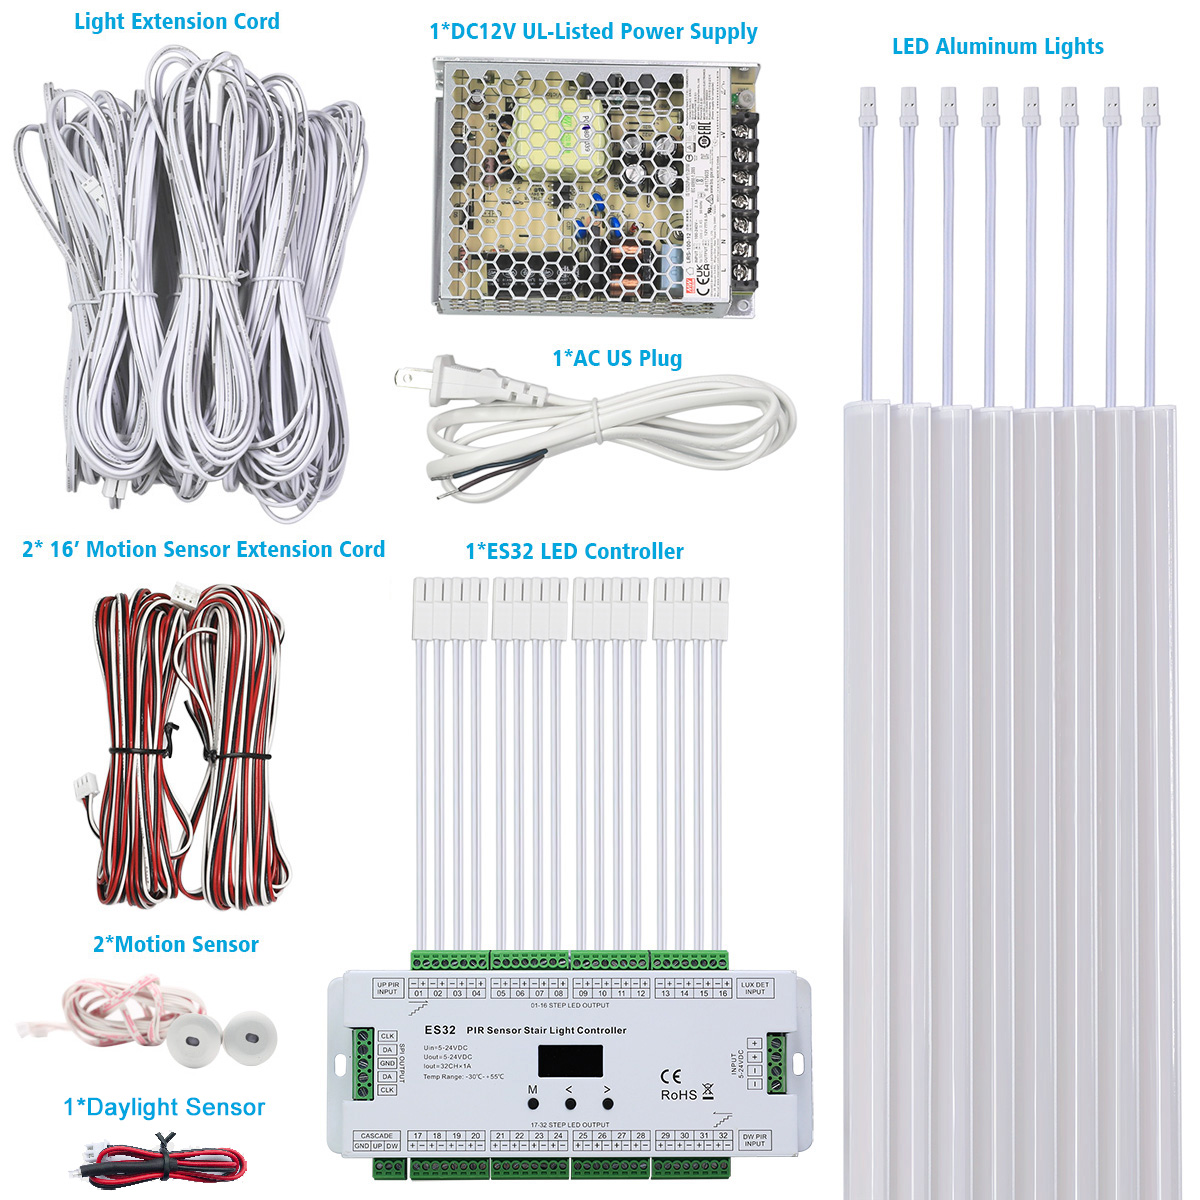
Our LED stair lights kit comes complete: LED strips, aluminum channels, an LED stair light controller with two motion sensors or PIR sensors, and an LED power supply with an AC plug. Here is what each part does:
| Part | What it does | Options |
|---|---|---|
| LED strip lights | The step lights: one strip under each tread, or along the stair railing or the stair wall | Single color COB LED strips for the stepping effect; white light addressable LED strips for the flowing effect (power them separately) |
| LED stair light controller | Lights the steps one after another when a sensor is triggered, then turns them off | ES32 (32 steps, PIR sensors), CT3288 and HBKIT-36S-C (motion sensors). Shop the LED stair light controller & module |
| Two sensors | One at the first step and one at the last step, so the lights answer from both ends | PIR sensors detect the human body’s heat; motion sensors detect its movement |
| Power supply | Powers the controller and the step lights; plugs into the wall outlet | A 12V power supply, matched to your stair lighting |
| LED aluminum channels | Optional: strip, PC diffuser and end caps; surface mounted with brackets or double-sided tape, or recessed in the tread | Floor stair LED aluminum channel, LED stair nosing profiles |
| Extension cords | Connect each step light to the controller. The default light strip wire is 0.2 m | 1 m, 2 m and 3 m, or a custom length |
Tools: a tape measure and a screwdriver. Browse the kits by where they go: motion sensor stair tread lighting, accent side mount stair lighting, smart home staircase lighting and exterior deck outdoor step lights.
Material needed:
• LED strip lights(Single color COB LED lights or white light addressable LED strips)
• LED stair light controller(ES32, CT3288, HBKIT-36S-C)
• Two PIR sensors or motion sensors
• Tape measure
• Screwdriver
Stair light wiring diagram: sensors, controller and step lights
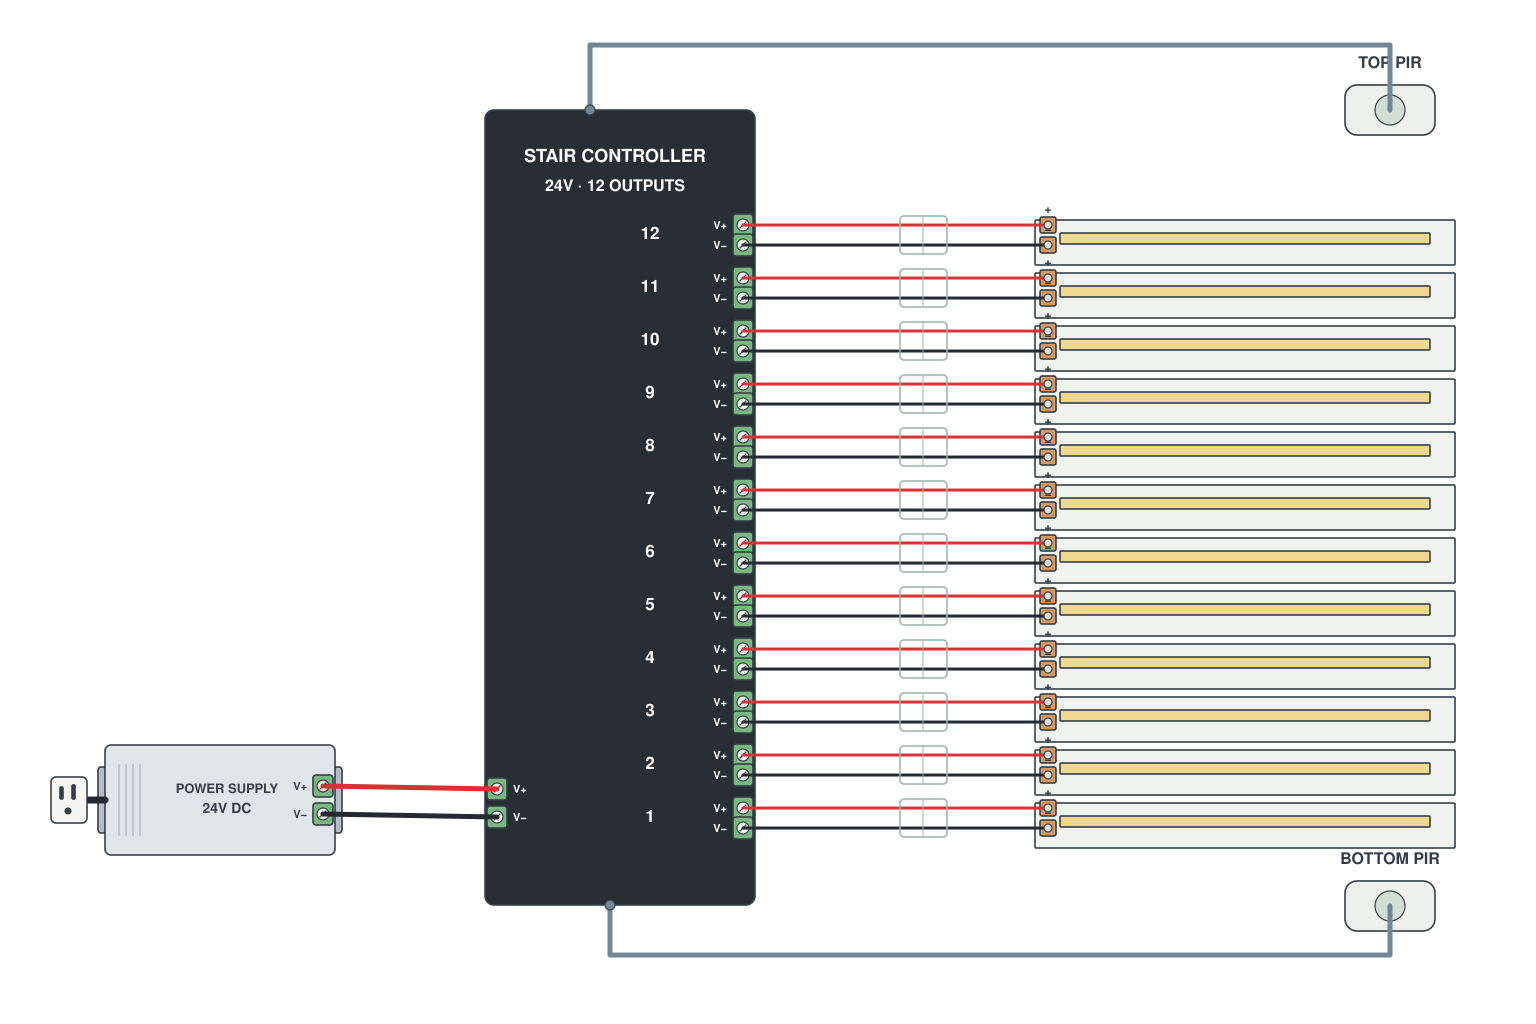
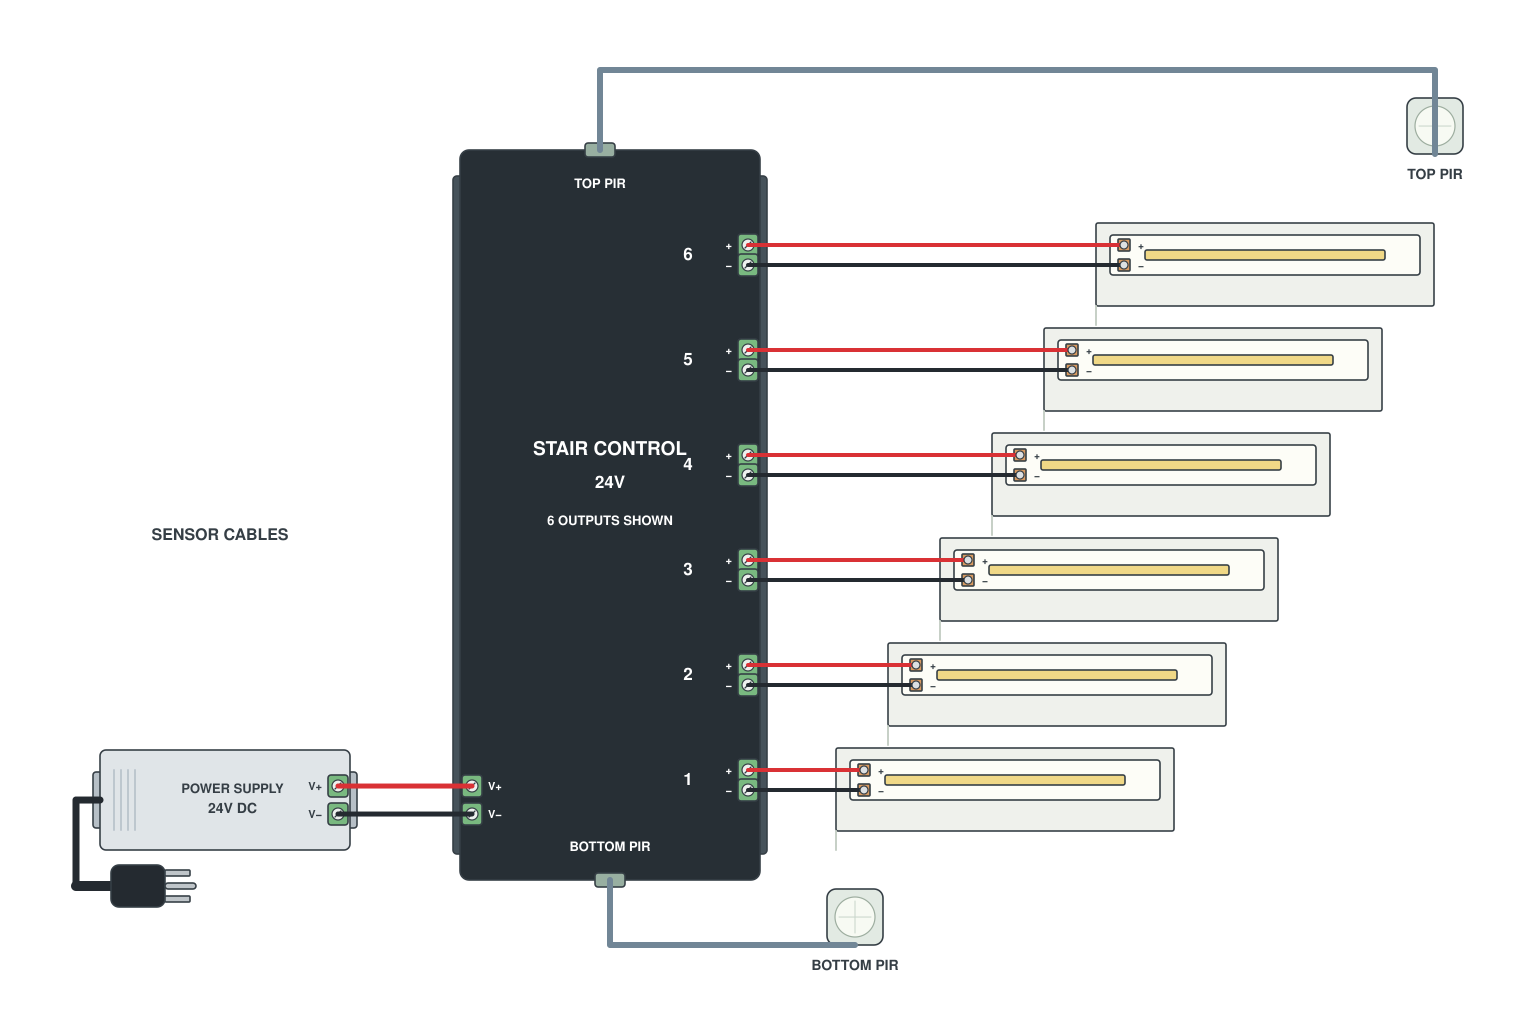
A motion sensor stair light kit is wired like this: one short strip under each tread goes to a numbered output on the stair controller (1 = bottom step), a PIR sensor at the top and one at the bottom go on the two sensor inputs, and the power supply feeds the controller. The controller and its supply sit under the stairs or in the cupboard.
| Connect | From | To |
|---|---|---|
| Step lights | The strip on step 1 (bottom), step 2, step 3 and so on, with an extension cord if needed | Output 1, 2, 3 on the stair light controller. Mark each cord with its step number |
| Sensors | The PIR or motion sensor at the first step and the one at the last step | The two sensor inputs on the controller |
| Power | Power supply DC output: positive and negative | The controller’s power input. Do not connect the positive and negative poles in reverse |
| Mains | The power supply’s AC plug | The wall outlet, or a smart control switch installed in front of the power supply |
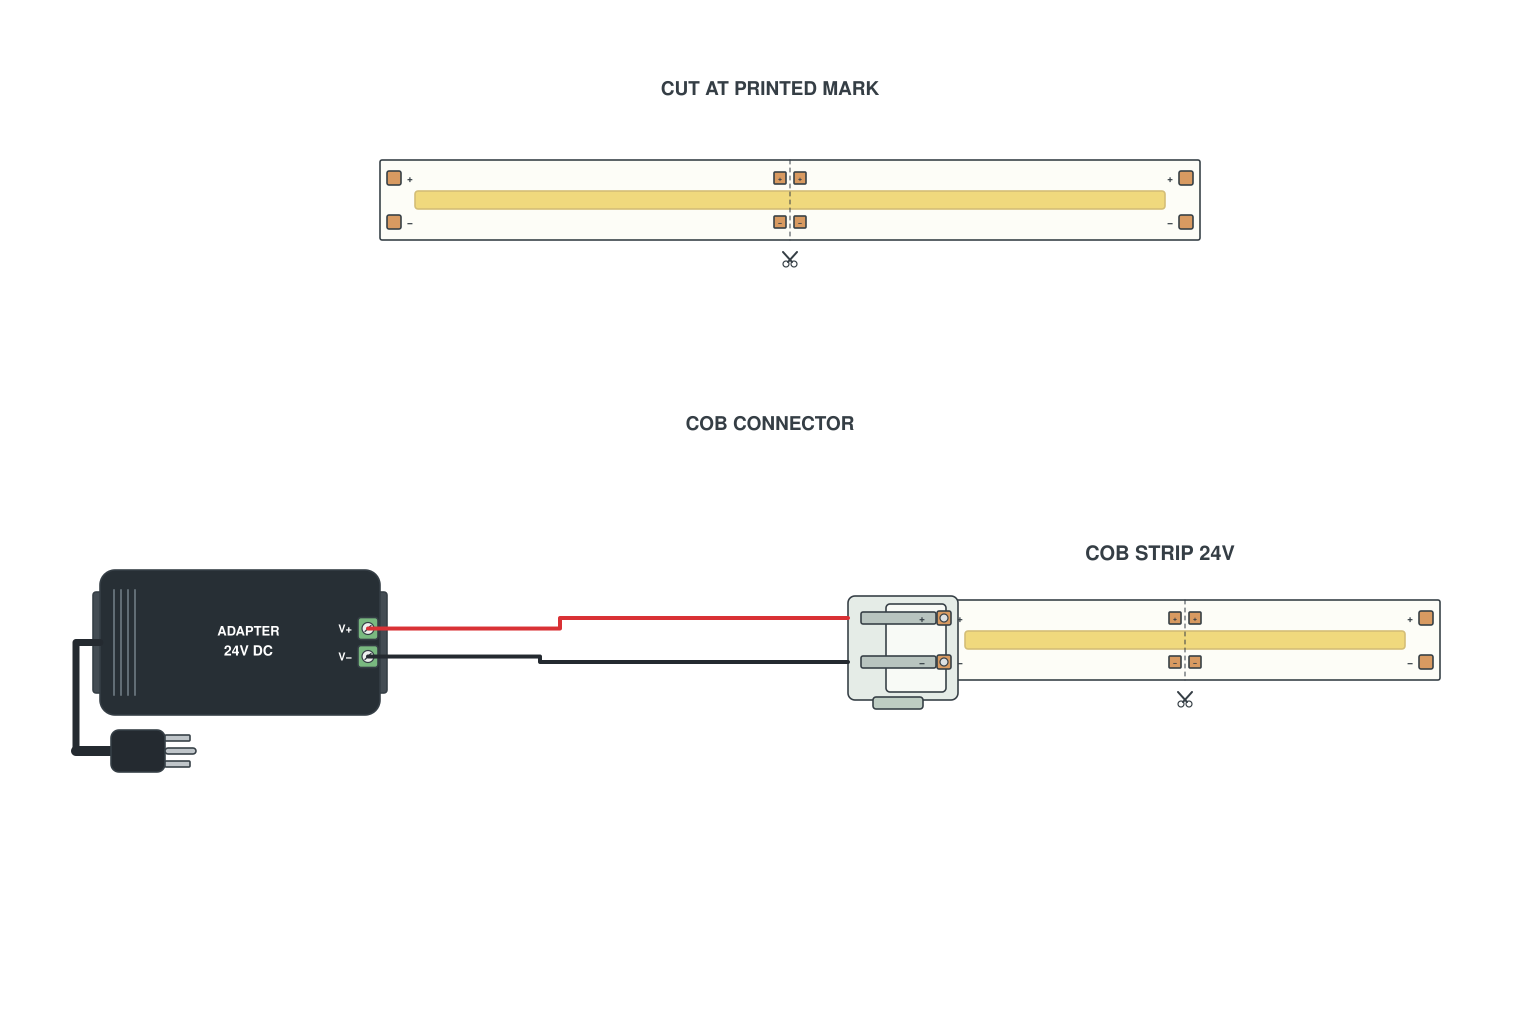
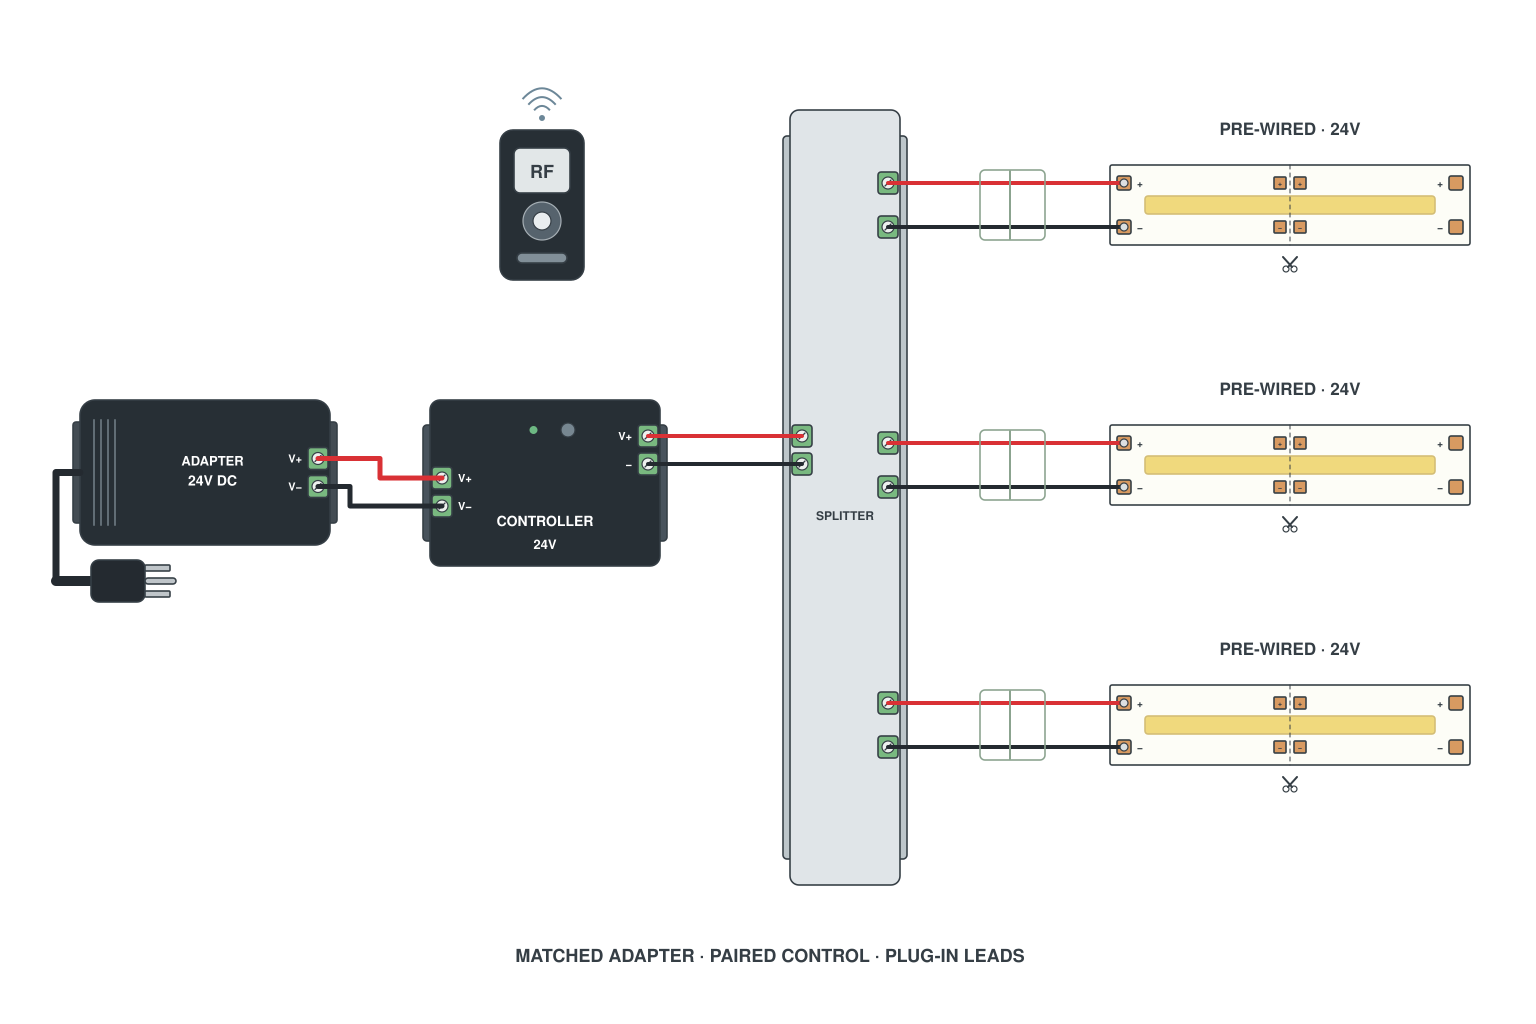
These diagrams are drawn by the SuperLightingLED engineering team. Wire colors follow our house convention: red V+, black V-/GND. Click a diagram for the full notes in our LED strip wiring diagrams library.
Manuals: ES32 stair light controller manual, the ES32 PIR sensor stair lights controller with stair lighting kit (PDF) and the ES32-V OLED display PIR sensor stair light controller installation guide (PDF).
Want a motion sensor on a single LED strip rather than a staircase? Browse our motion sensor LED light strip kits, sensor switches, sensor dimmers and motion sensor closet lights.
How to install motion sensor LED stair lights in 7 steps
Here we take the LED stair light ES32 controller as an example.
Step 1. Determine the staircase steps number and length.
The number and length of the staircase steps are closely related to choosing which LED stair light controller and how much power the indoor stair lighting consumes.
LED strip lights are an economical choice to be staircase lighting due to their various advantages. The LED stair light ES32 controller supports 32 steps, that is, 32 single color LED strip lights are used, and 2 addressable LED strips.
The number and length of the staircase steps is proportional to the required stairway lighting power. The greater the steps number and length, the greater the step lighting power consumption.
Step 2. Measure the distance between the stair light controller and the staircase.
To determine the length of the light strip extension cord.
The LED stair light kit we default the light strip wire length is 0.2m, and it may be not enough. So we provide 1m, 2m, and 3m extension cord options to connect the step lights to the ES32 controller.
Feel that the extension cord length is still not enough, please contact us to customize the length.
Step 3. Install the step lights under the stair treads.
We choose the COB LED strips as a stair lighting source, which emit a linear lighting, and no light spot. More knowledge about COB LED please move to our COB article.
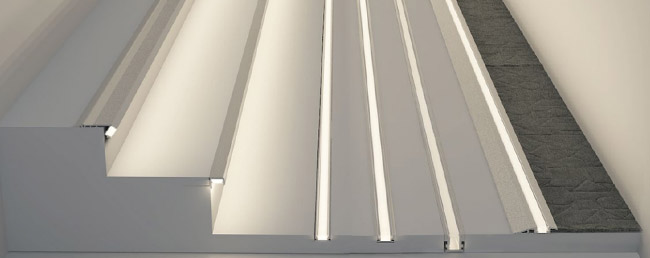
LED aluminum channels are the optional choice in our stair light kit, you can choose to install the tread lights in the channels or directly install the lights in the stair, and it all depends on your personal preference.
For who determining to add the aluminum channels to his LED tread lights, I believe you must want to know how to install the stair lights with the aluminum profile.
Tear off the stair light strip adhesive and stick it to the aluminum channel, cover the PC diffuser, and then cover the end caps, the step light wire can be through the hole of the end cap to connect the LED stair light controller.
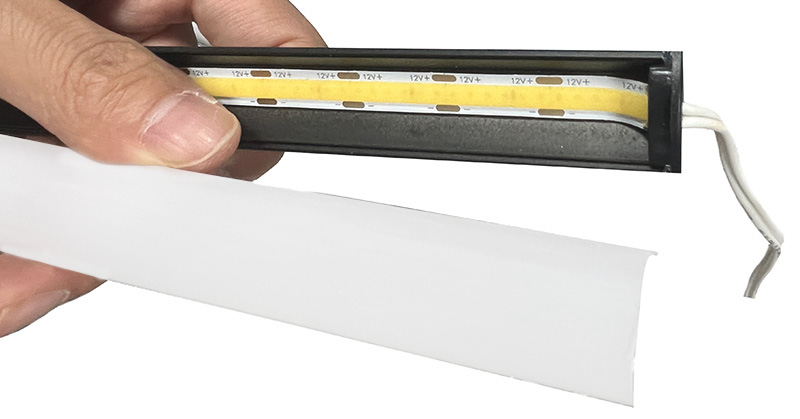
The LED aluminum channel with the step lights in can be fixed the stair surface by mounting brackets or double-sided tapes.
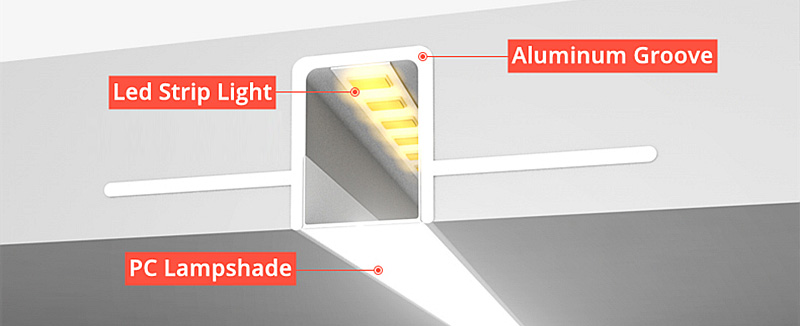
Choosing to embed the LED aluminum profiles in the treads will make the stairway lighting appearance more beautiful and natural. Pay attention to whether the step light reserved size matches the LED aluminum profile size.
* Guide to comprehensive understanding LED aluminum channel: Ultimate Guide on Aluminum Profile for LED Strip Lighting
Channel for the treads. Stair treads with a nosing or a recess take a floor stair LED aluminum channel or LED stair nosing profile. Cutting COB strips to the step width? See diagram C14.
Step 4. Mount the motion sensors or PIR sensors.
The two LED motion sensors or PIR sensors are placed at both ends of the stairs. One LED motion sensor or PIR sensor is installed in the first step, and the another sensor in the last step.
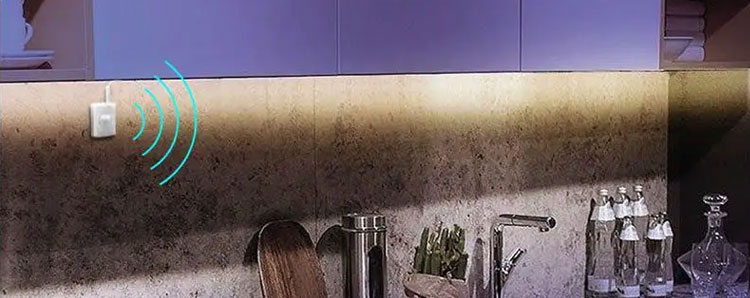
The LED stair light ES32 controller uses two PIR sensors. The PIR sensor detects the human body's heat. While the others two stair light controller(CT3288, HBKIT-36S-C) use motion sensors detecting the human body's movement.
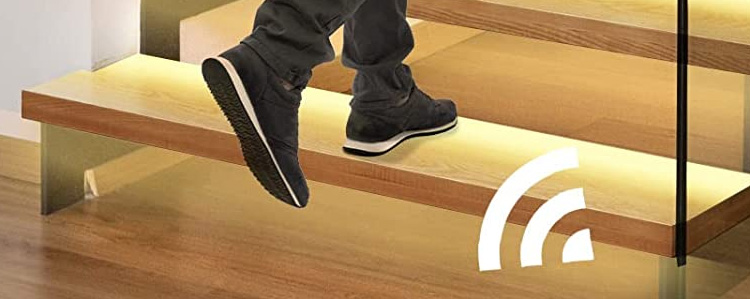
When you walk into the sensing range of the stair light sensor, the LED tread lights will automatically light up. The LED stair tread lights follow your steps to light up from the first step to the last step.
It is worth noting that the time from the LED step lights light on to light off is fixed, but the speed at which the stair lights turn on can be adjusted. You can adjust the speed of the LED stair lights to match your walking speed.
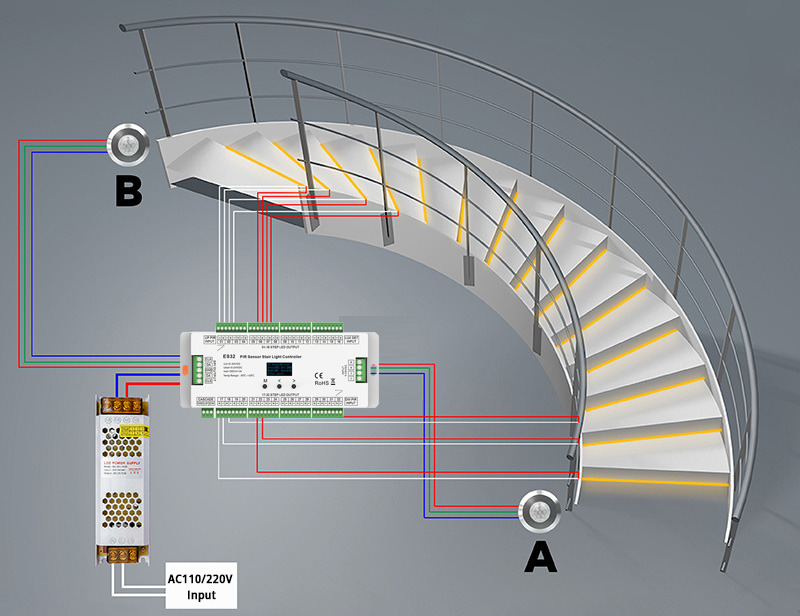
Step 5. Connect the step lights and sensors to the stair light controller.
Hardwired the LED stair light ES32 controller, you need to use the screwdriver to loosen the screws, then put the step lights wires to the corresponding holes, and tighten the screws again.
Due to the various step light extension cords, to not confuse the stairway light steps, mark the step light extension cord with 1, 2, 3, which means that is the first step or the second step.
The stair lights of each step should be connected to the corresponding number. The first step of the stair lights is connected to the number 1. And other tread lights are deduced by analogy.
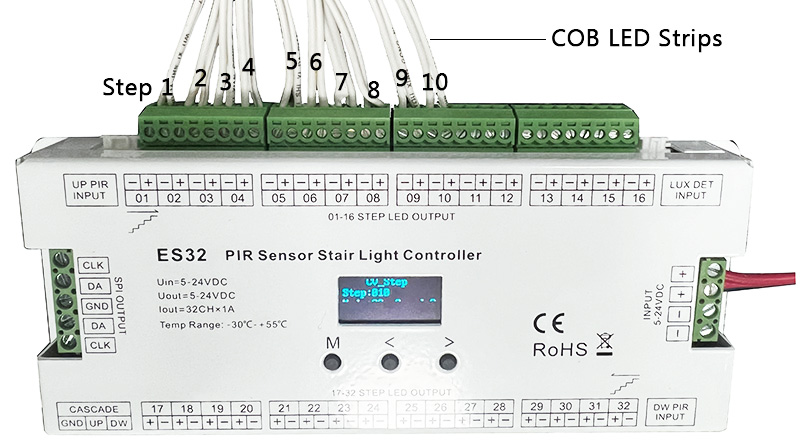
Check before powering up. Each numbered output takes the step of the same number, and the two sensors go on the two sensor inputs, as in diagram L7.
Step 6. Connect the stair light controller to the power supply.
In this LED stair light kit, we will match a suitable power supply for your stair lighting to make your step lights work perfectly.
When connect the LED stair light ES32 controller to the power supply, do not connect the positive and negative poles in reverse.
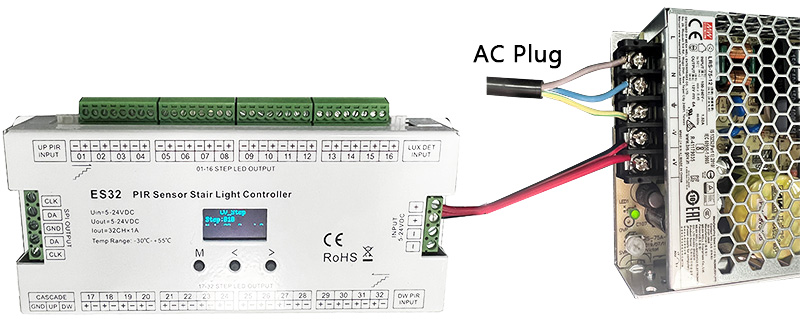
Step 7. Power the stair light controller and the step lights.
Finally, plug the LED power supply to the wall outlet.
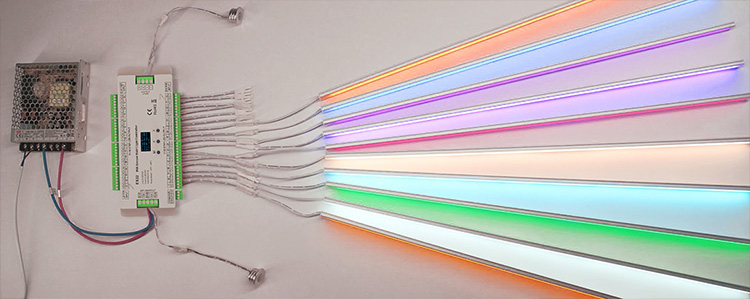
Now, let us appreciate the LED lighting effect of the staircase lights.
Control modes, smart switches and hidden wires
The LED stair light ES32 controller can adjust a variety of modes to control the LED stair lights, refer to the manual to get the specific control mode.
For the LED stair lights mode that can only be changed through the buttons of the stair light controller, some users may want more convenient and intelligent control methods.
You can use a smart control switch installed in front of the power supply, AC input and AC output, to control the whole stair lights. Turn the LED step lights on or off, set a certain time to turn on the stair lights, mobile phone remote control, and voice control with Amazon Alexa and Google Assistant.
To hide the exposed LED stair tread light wires to show their beauty, you can reserve a wire installation slot in advance or purchase a wire slot kit at the local building material store. During the LED stair light installation process, you can seek help from the electrician if you want to hide the complicated wires or you do not make sure do the job by yourself.
If you have questions, feel free to contact us.
Prefer a staircase you control from your phone or by voice? See our smart home staircase lighting.
* Everything you should know before buying LED strip lights:
Is it worth getting led strip lights?
Flexible led strip lights VS rigid led strip lights
Top 6 Considerations Before Buying LED Strip Lights
* Knowledge about LED color and white light color temperature:
The Color Difference Between Warm White 2700K, 3000K, 4000K, 6000K Pure White and 7000K Cool White
What is CT(LED white light color temperature)?
How to choose the right color for your led strip lights?
Ultimate Guide to Choosing the Right Addressable LED Strip
What is CRI(color rendering index)?
* What you need to know about led strip installation:
How to connect two light strips together?
How to wire single color led strip lights?
How to wire tunable white/CCT led strip lights?
How to wire RGB color changing led strip lights?
How to wire RGBCCT led strip lights?
How to wire addressable led strips?
How to install led strip lights? What accessories will be needed?
Motion sensor stair lights FAQ
How do you wire stair lights with a motion sensor?
Each step light goes to a numbered output on the stair light controller, starting with output 1 for the bottom step. The two PIR or motion sensors go on the controller’s two sensor inputs, and the power supply feeds the controller. Mark the extension cords 1, 2, 3 so the steps do not get mixed up.
Where should the motion sensors go on a staircase?
At both ends of the stairs: one sensor at the first step and the other at the last step. When you walk into the sensing range, the tread lights light up from the first step to the last. If people go up and down at the same time, the lights run from the two ends to the middle.
How many steps can one stair light controller run?
The ES32 controller in this guide supports up to 32 steps. Count your steps and measure their length first: they decide the controller and the power the stair lighting needs.
What is the difference between a PIR sensor and a motion sensor for stair lights?
A PIR sensor detects the heat of the human body; the ES32 controller uses two PIR sensors. The CT3288 and HBKIT-36S-C controllers use motion sensors that detect the body’s movement.
Do motion sensor stair lights need aluminum channels?
No, the aluminum channels are optional. You can install the tread lights in the channels or directly in the stair. A channel is fixed to the stair with mounting brackets or double-sided tape, or recessed in the tread; check that the reserved size matches the profile size.
Stair lighting parts
 LED stair lights kitsStrips, controller, sensors and supply
 Motion sensor stair tread lightingStep lights under each tread
 Stair light controllers & modulesThe controller and its sensors
 Accent side mount stair lightingLights along the stair wall
 Motion sensor LED light strip kitsSensor-switched strip kits
 Floor stair LED aluminum channelsChannels for treads and floors
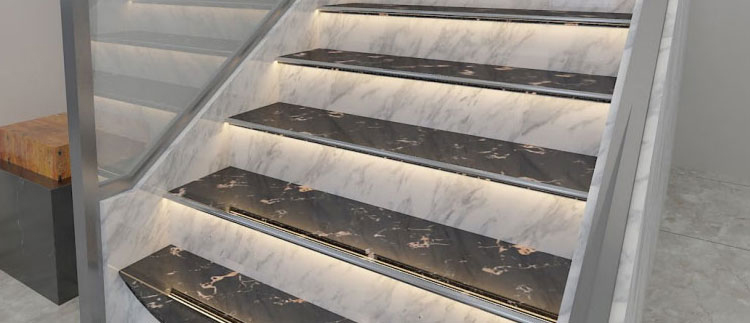 LED stair nosing profilesLight on the edge of the step
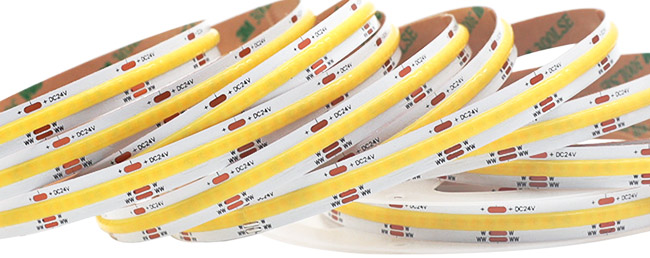 Flexible COB LED stripsLinear light, no light spots
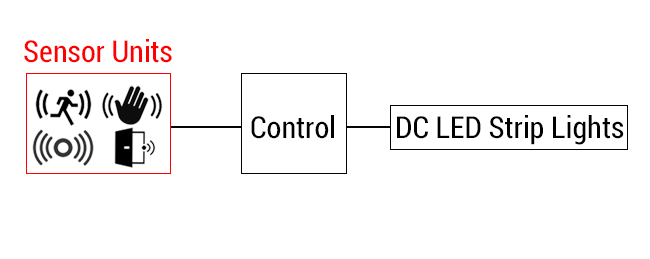 Sensor switchesFrom our Sensor Series
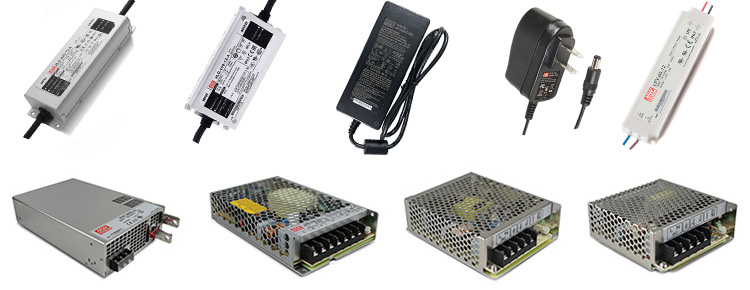 DC12V MW UL-listed power supplies12V supplies for stair kits
Send us the number of steps, the step width and the distance from the controller to the stairs, and the SuperLightingLED team will match the kit, sensors, extension cords and power supply. Tell us the lengths and we cut, solder and label each step light before shipping. Standard orders such as accessories and controllers ship within 24–48 hours; LED strip orders follow the production lead time shown on the product page. Contact our team