
How to Wire RGB Color Changing LED Strip Lights?
An RGB LED strip has four wires: one common positive (V+) and three negatives for red, green and blue. Wiring it takes three steps:
- Strip to controller: match V+, R, G and B on the strip to the same marks on the RGB controller output.
- Controller to power supply: red wire to positive, black to negative. Never reverse the polarity.
- Plug in and test all three colors before you stick the strip down.
Longer than one 5 m (16.4 ft) reel? Use a constant current RGB strip, an RGB amplifier, RF controllers that sync, or a DMX decoder (see long runs).
RGB lights that we commonly found have RGB room lights, RGB lights for desk, and RGB outdoor lighting. RGB means the colors of the three channels of red, green, and blue. Various colors can be obtained by changing the three color channels and superimposing them with each other. Each RGB light has 256 levels of brightness, and 256 levels of RGB light colors can combine a total of about 16.78 million colors.
SMD 5050, 4040, 3838, 3535, 020, and 4713 LED chips are used in RGB led strip lights. Among them, 5050 is the most commonly used LED chip, and it is called the 5050 RGB led strip. 020 and 4713 are side-emitting RGB lighting, its light-emitting angle is especially suitable for counters and gaps with narrow installation positions, and for side projection of displayed products.
The three RGB channels are integrated into one LED light. RGB strip lights can quickly change various colors, how to use RGB strips as much as you want, keep watching.
At SuperLightingLED we wire RGB LED strips for customers every day, from a single 5 m reel behind a TV to long runs around a shop ceiling. Below are the wiring diagrams we use, the three installation steps, and what to do when a color does not light up.
RGB LED strip wiring diagram
An RGB LED strip is common anode: the V+ pad feeds all three colors, and the controller switches each color on its own negative line. Match the four pads one to one:
| Pad on the strip | What it is | Connect to |
|---|---|---|
| V+ | Common positive, 12 V or 24 V to match your strip | V+ on the RGB controller output |
| R | Red channel (negative) | R on the controller output |
| G | Green channel (negative) | G on the controller output |
| B | Blue channel (negative) | B on the controller output |
These diagrams are drawn by the SuperLightingLED engineering team. Wire colors follow our house convention: red V+, black V-/GND. Click any diagram to see it full size with notes in our LED strip wiring diagrams library.
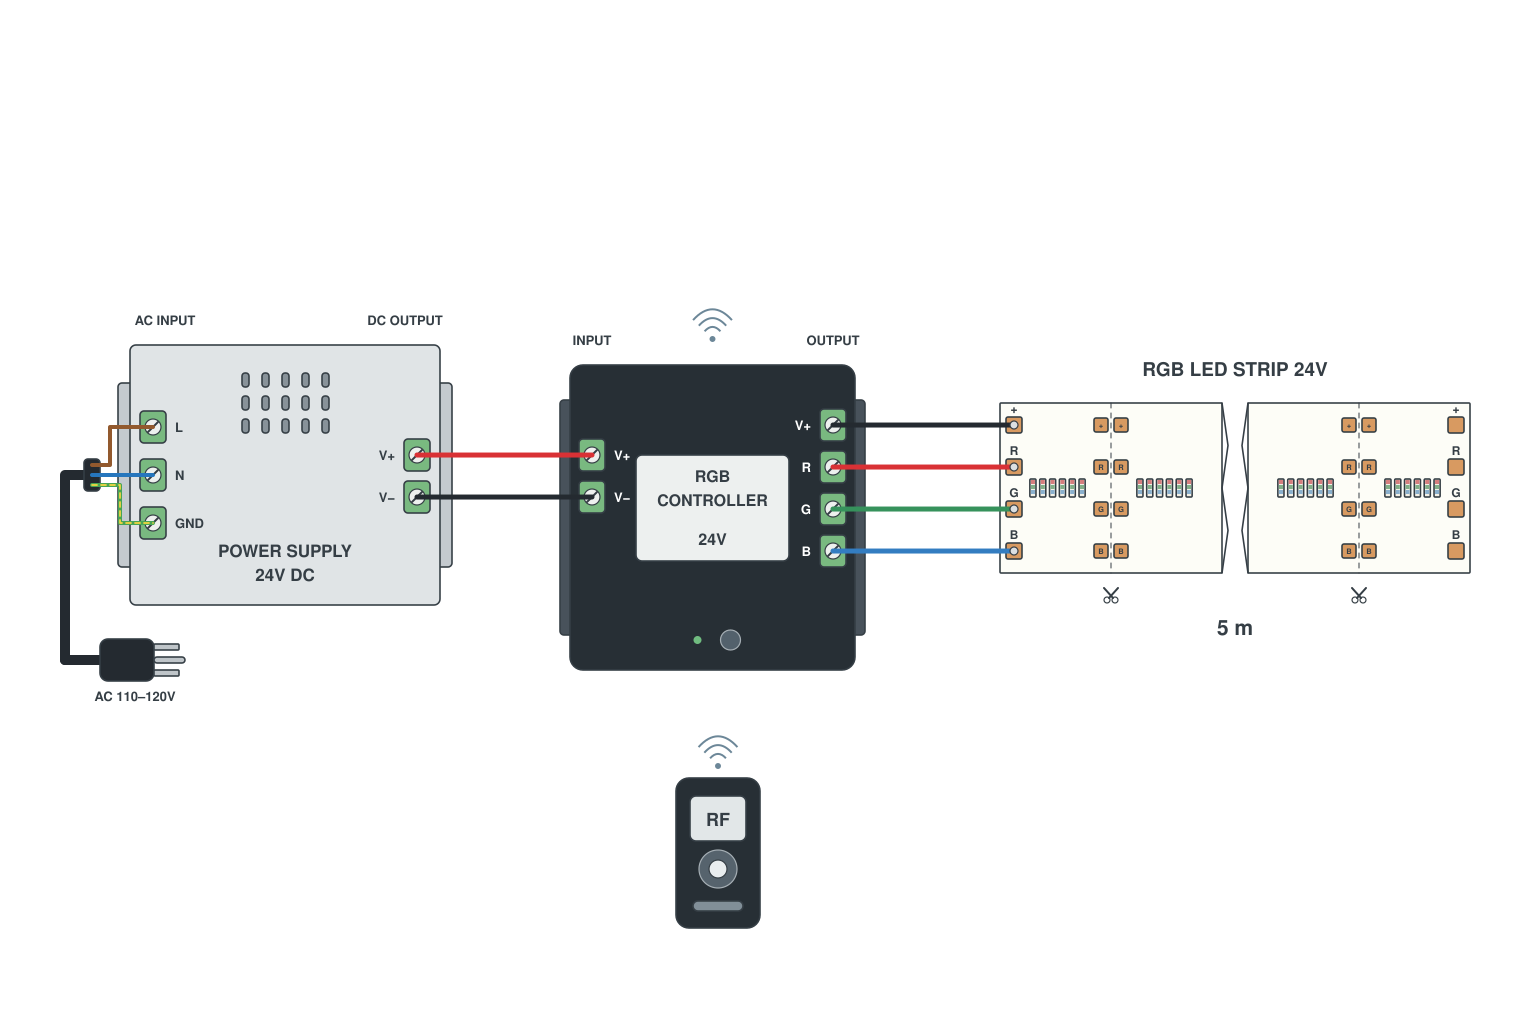
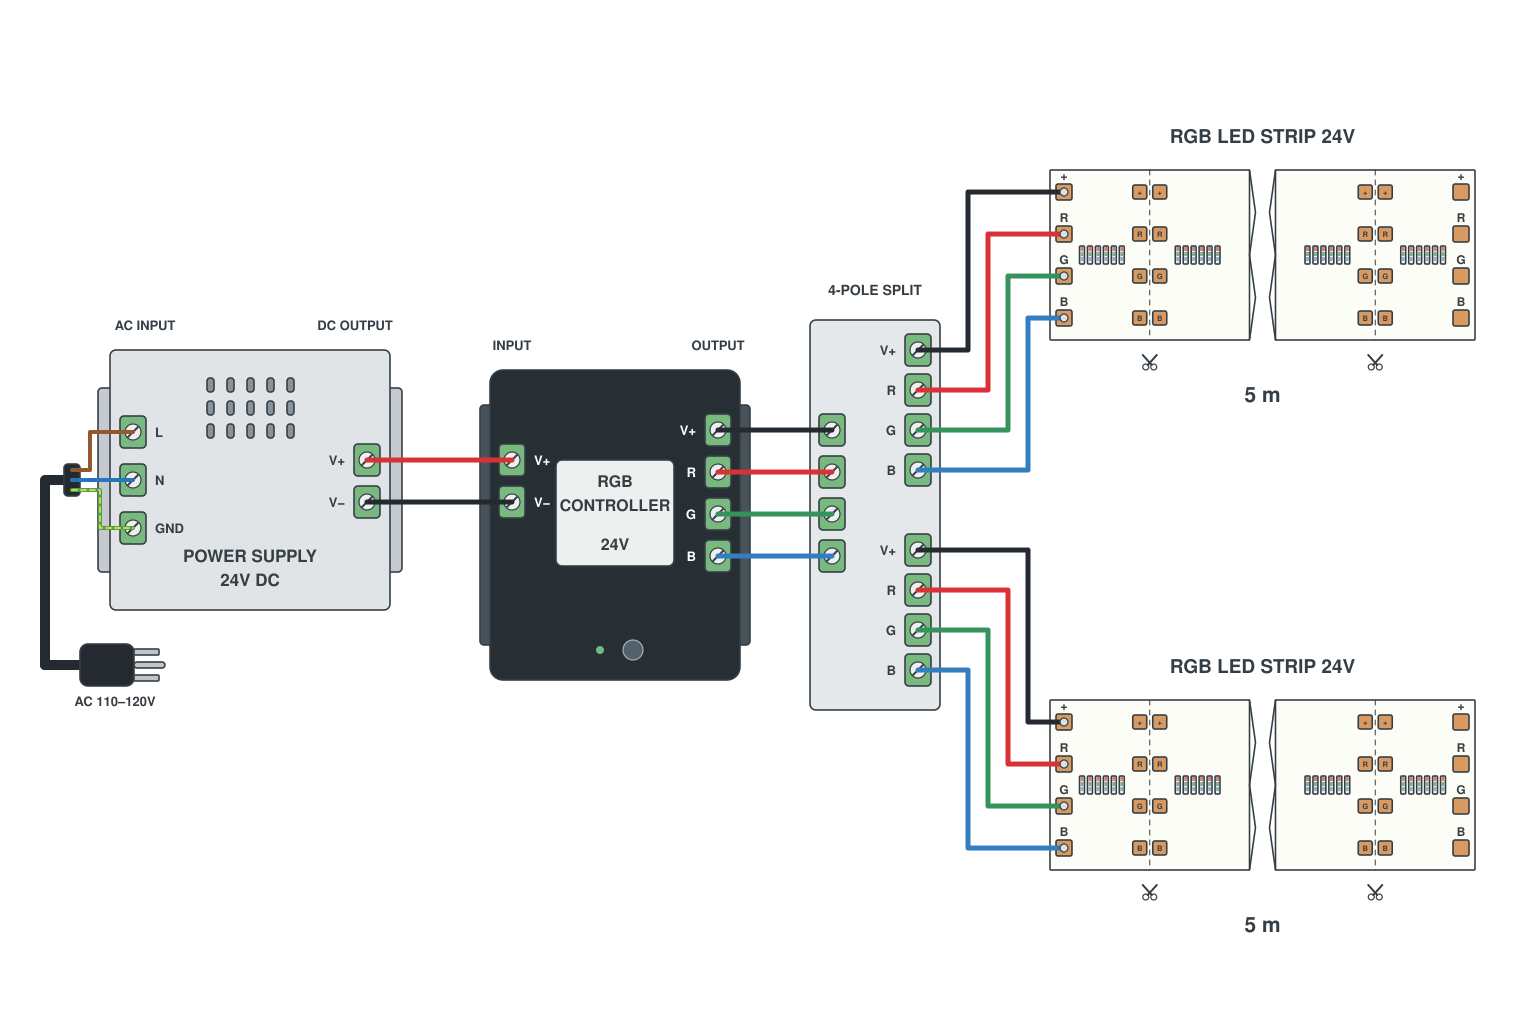
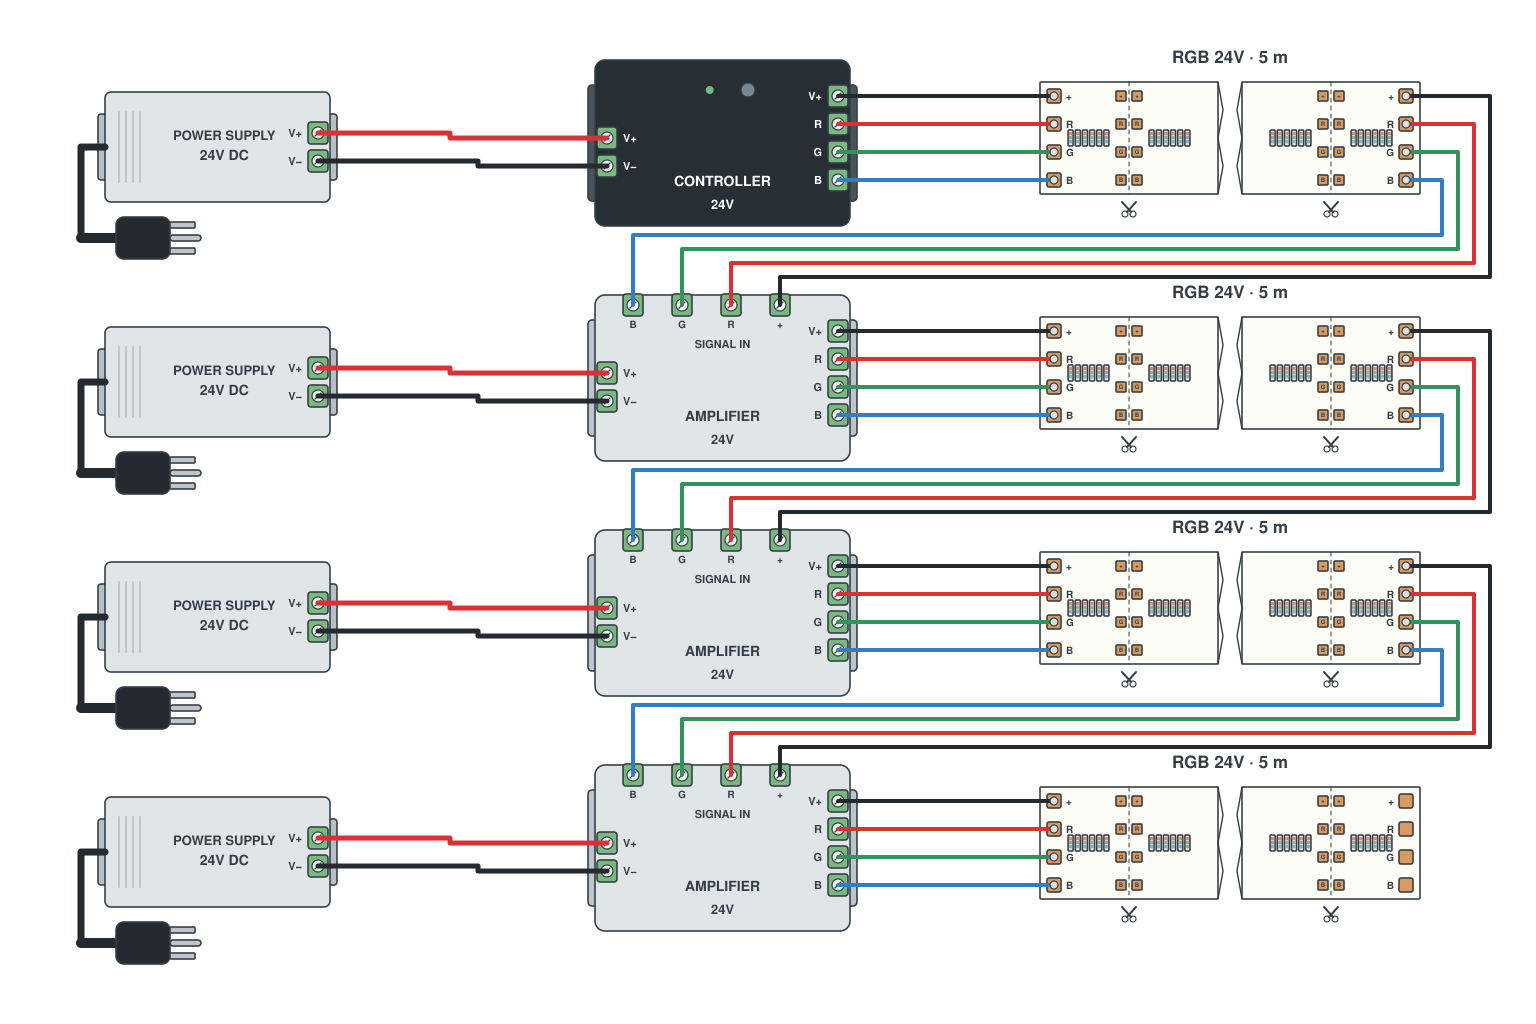
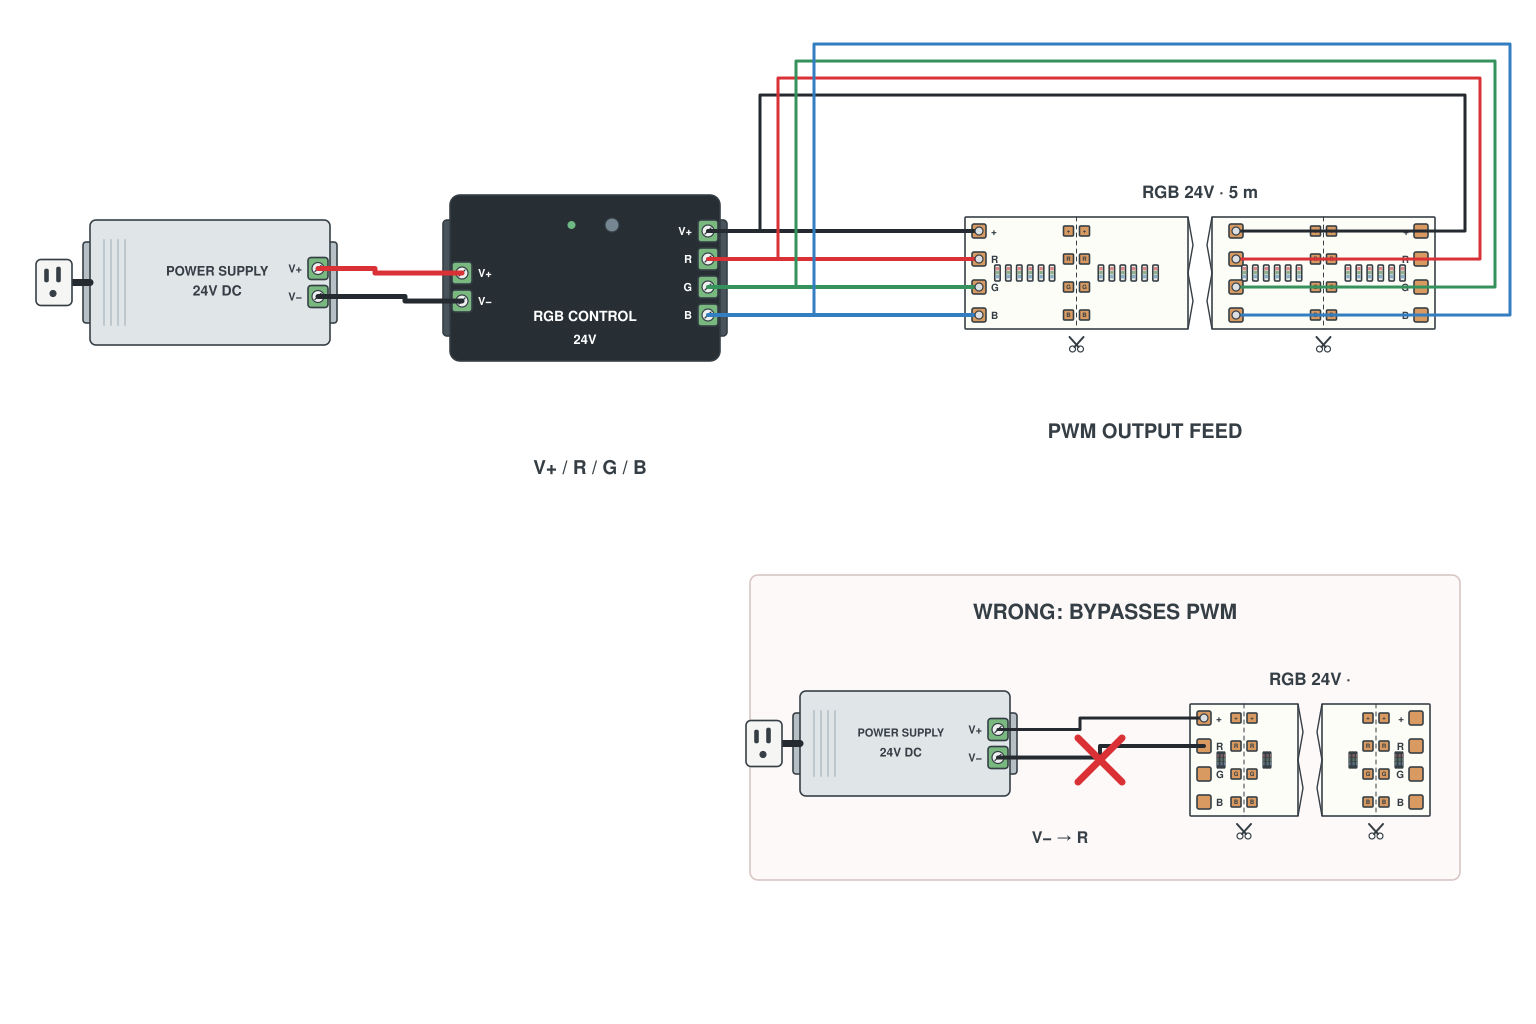
How to install RGB LED strip?
The existence of the RGB led strip wiring diagram makes the RGB led strip wiring simple, and the wiring process is not difficult. Now, we will introduce step by step how to install the RGB light strip.
Before wiring led strip lights, make sure the power is disconnected and the objects are intact. The following tools will be used: RGB led strip, RGB led light controller, power supply, screwdriver, wire stripper.
Step 1. Connect the RGB light strip to the RGB led light controller.
There is an extension cord at the end of the RGB led strip light, easy to connect to the RGB led controller. RGB strips have four wires, three negative poles and one positive pole. The RGB rope light marks are connected with the same marks on the led controller one by one.
The screws on the RGB led light controller are tightened. Before connecting, use a screwdriver to loosen it, put the wire in and tighten it.
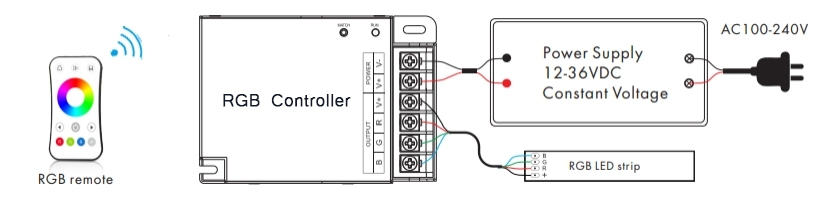
1) How to connect the RGB led strip lights after cutting?
Solder a piece of 4-pin bare wire on the connection point of the RGB light strip after cutting, and then make the above connection.
2) How to hardwire the RGB led strip with a plug?
If your RGB led strip light has a plug, cut off the plug before hard wiring, use a wire stripper to expose the inner core of the wire, and then connect it.
Step 2. Connect the RGB led light controller to the power supply.
The RGB led controller input is connected to the power supply, output is for RGB led strip connection. Connect the positive and negative poles to complete the connection, note that the red wire is the positive and the black is the negative. Please be very careful not to reverse the polarity.
In the process of using the RGB light strip, the power of the RGB strip can only consume 80% of the power of the RGB led controller and the power supply, which is safe and durable. Check if your led light strip is overloaded.
Not sure how big a supply you need? Work it out with how to calculate power for LED strip lights, then pick one from our LED power supplies.
Step 3. Plug the power supply into the socket.
Test if the RGB light strip is connected correctly.
Why won't my RGB LED strip light up?
Why my RGB lights won’t light up? If it is found that the RGB light does not light up, it may be due to wrong wiring of the positive and negative poles, or poor contact of the LED pins of the RGB strip.
- Nothing lights: check the supply is on and the red and black wires to the controller input are not reversed.
- Colors are swapped (you press red and get green): two of the R, G, B wires are crossed. Swap them at the controller.
- One color is missing: that channel’s wire or pad has a poor contact. Re-seat the connector or re-solder the pad.
- The far end is dim or off-color: voltage drop on a long run. See long runs below.
How to fix the led light strips? Watch the video below to teach you to find and solve the problem of the LED light not turning on.
Related reading: How to calculate the power for your led strip lights?
How to install RGB light strips over long distances?
An RGB led strip is generally 5 meters/16.4ft long. If your led project requires 20 meters or even 30 meters, which is equivalent to 4 or even 6 RGB led strip lights, how to install it? We provide you with the following four installation options.
| Option | Best for | How far | What you need |
|---|---|---|---|
| Constant current RGB strip | New projects, one continuous run | Up to 30 m without voltage drop | 24V or 48V constant current RGB strip, matching supply |
| RGB amplifier | Several 5 m reels you already have | Add a section every 5–10 m | One amplifier and supply per section |
| RF controllers that sync | Separate zones, no signal wire between them | Up to 30 m between controllers; 100 m+ from the remote to the farthest one | One RF controller per zone, one remote |
| DMX decoder | Large projects and commercial lighting | Addresses set per strip | DMX512 console and one decoder per strip or zone |
1. If you are preparing to buy an RGB light strip, you can directly choose the ultra-long constant current RGB led strip.
The RGB constant current light strip can reach 30 meters without voltage drop, and there is no extra wiring cost for long-distance installation. We use increasing power supply to solve the voltage drop of the led light strip, so the voltage and power of the constant current led strip light will be larger than the general constant voltage led strip. This is a noteworthy aspect.
If you think this is not a problem, you can take a look at our 24V RGB constant current led strip and 48V RGB constant current light strip.
2. If you have purchased multiple RGB strip lights, don't worry, we will also attach the solution.
1) Use the RGB led amplifier
If you have prepared multiple RGB led strip lights, RGB led light controllers, and power supplies, and are preparing to install them, you can refer to this wiring method.
In the current situation where there is a voltage drop, an led amplifier can be used to enhance the attenuated signal to achieve the same color and brightness of the ultra-long led light strip.
The power of the RGB led amplifier should be greater than the power of the RGB light strip it is connected to, and it is better to leave room for excess power.
The following are two ways to connect the RGB led amplifier.
- RGB led amplifier series RGB light strip.

- RGB led amplifier parallel RGB led strip.
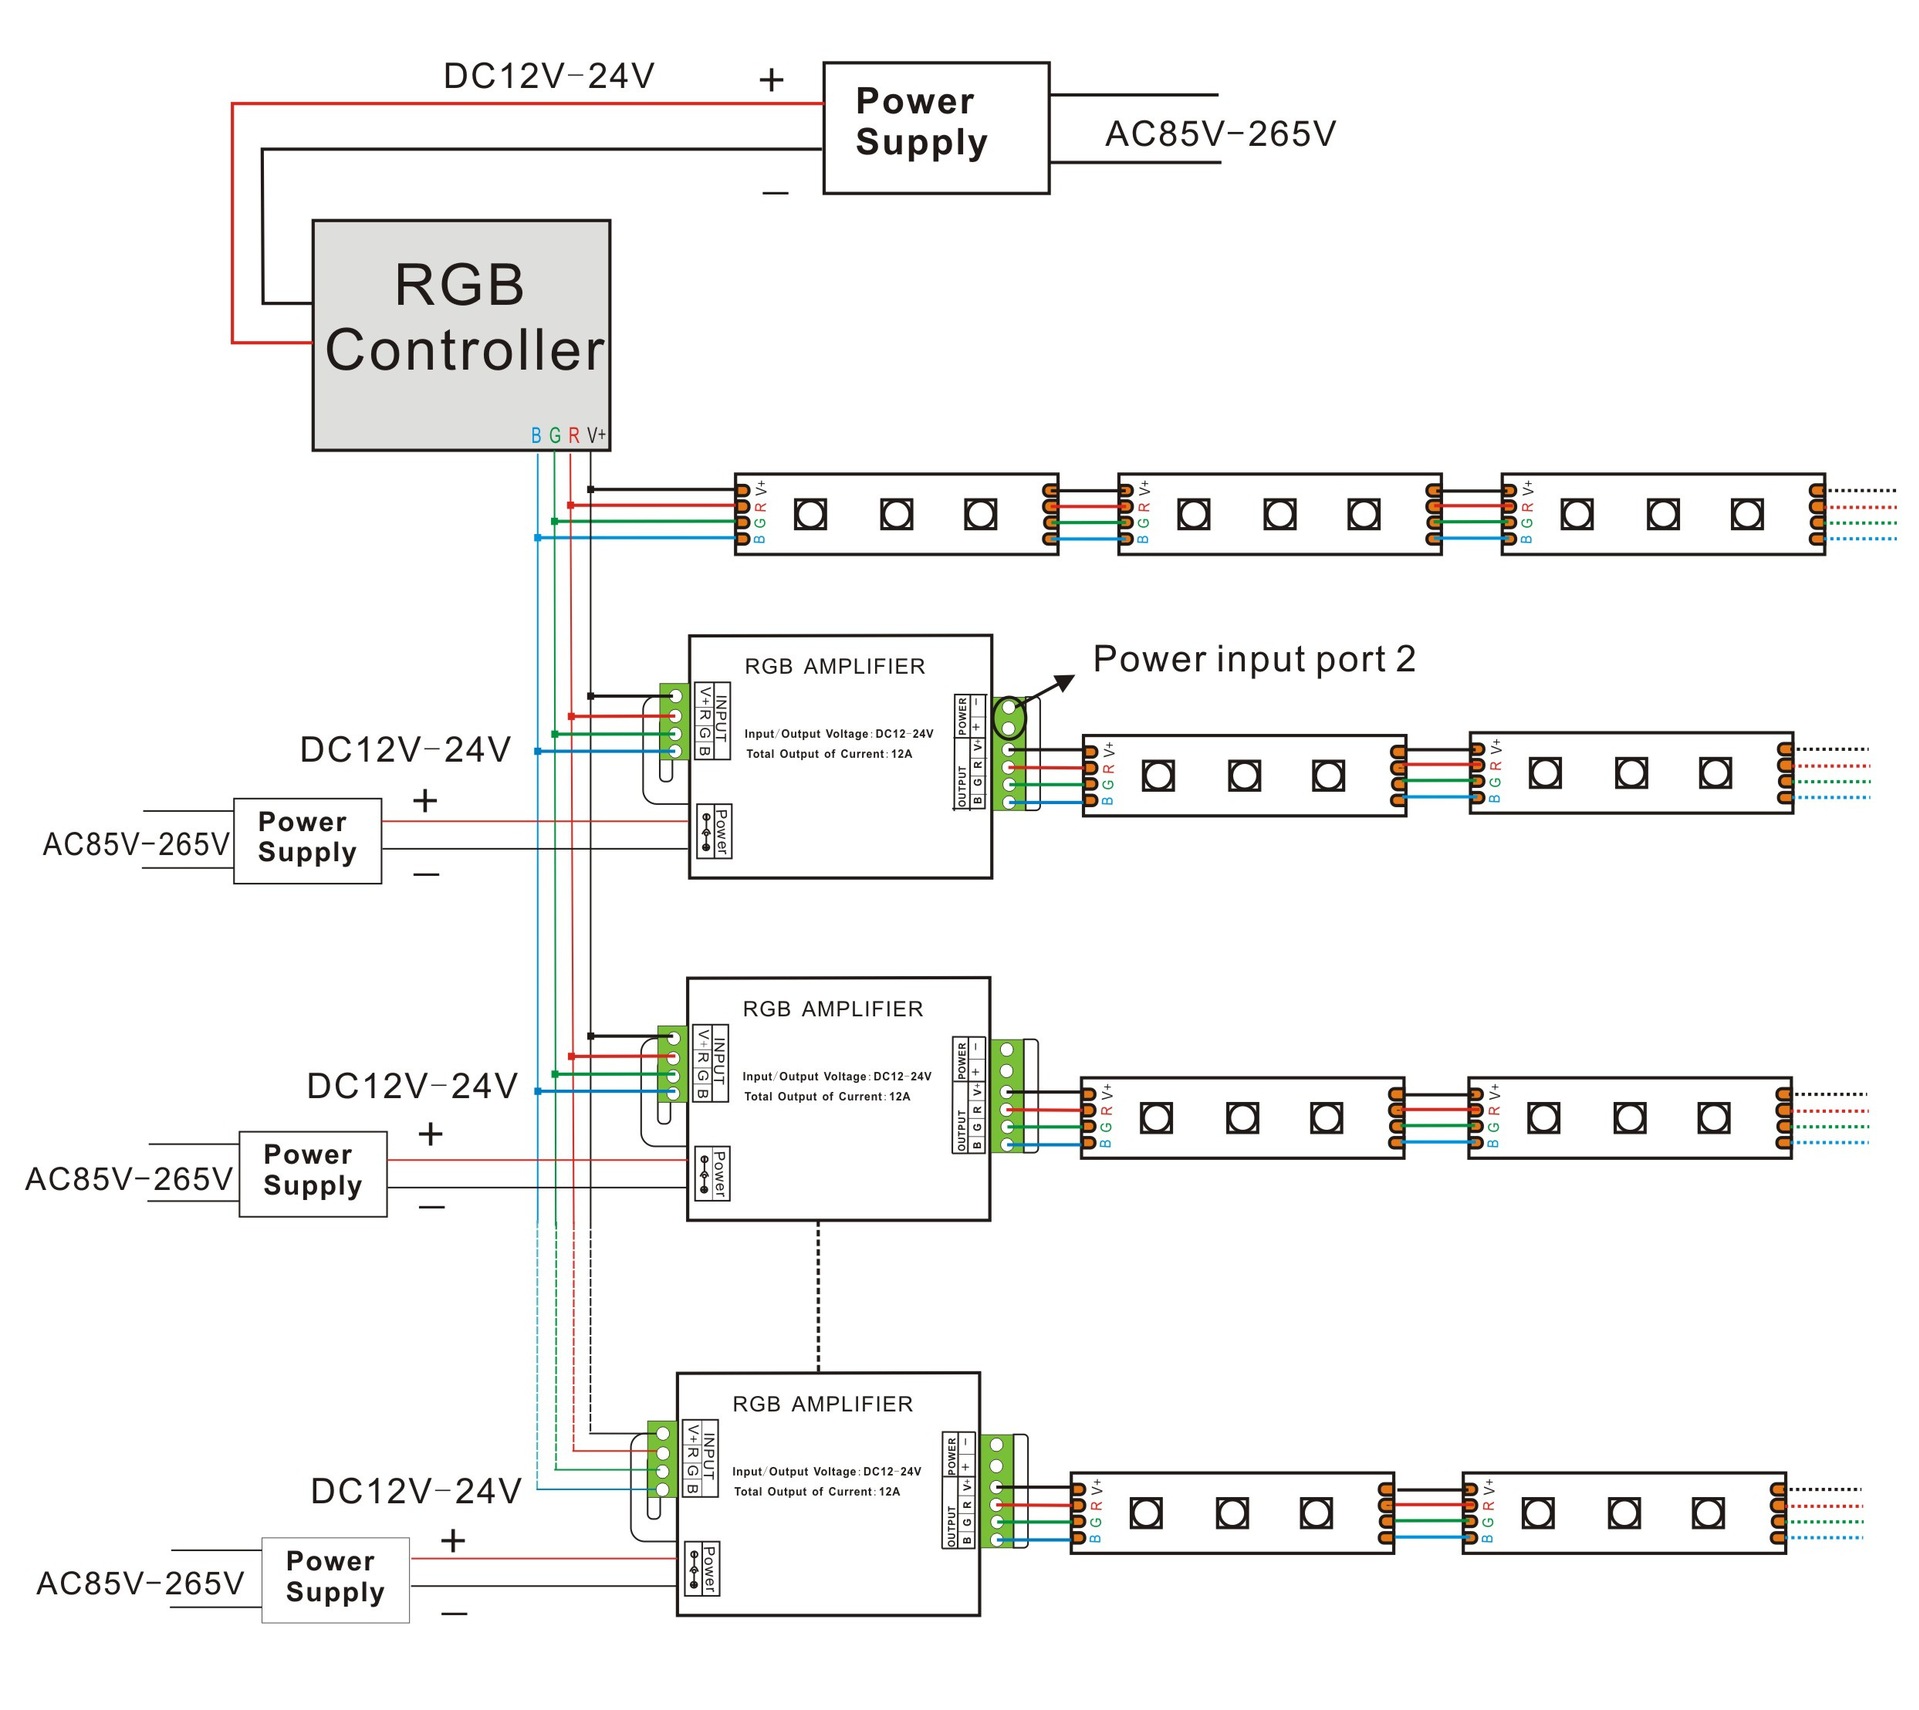
Shop LED strip amplifiers, or see the step-by-step amplifier wiring diagram.
2) Use RGB RF led controller automatically synchronizes
Maybe you are watching an RGB led light controller that can be used to control ultra-long-distance RGB led strip lights? You can take a moment to look at the RF RGB led light controllers, which will definitely give you something to gain.
The RGB RF led controller has three control methods, handheld remote, wall touch panel remote, and smart phone with WiFi-Relay. One RF controller can accept up to 10 remote control, and multiple RF led light controllers can be controller by one remote, realize multi-zone group control.
The RF controller receives the remote control signal and automatically transmits it to other controllers, within a range of 30 meters between each led controller, which can expand the distance more than 100 meters between the remote and the farthest controller.
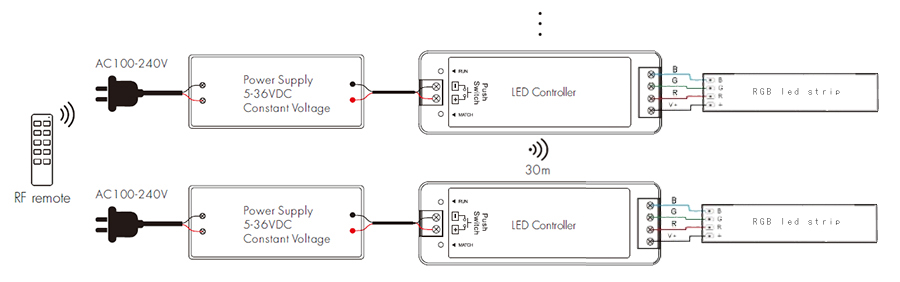
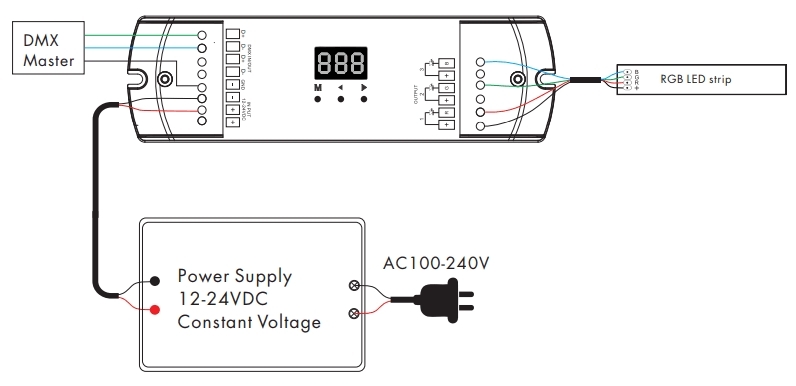
3) Use DMX decoder
If you want to apply the led light strip to large-scale projects or commercial lighting, DMX decoder is a good choice.
DMX512 decoder converts DMX512/1990 standard digital control signal into PWM control signal, so that ordinary RGB LED lights without decoding function can be controlled by DMX512 console.
DMX decoder is connected to an RGB led strip, this RGB light strip is an address, and multiple RGB led strip lights have multiple addresses. The decoder channel address can be set freely.
- Multiple RGB led strips cascaded.
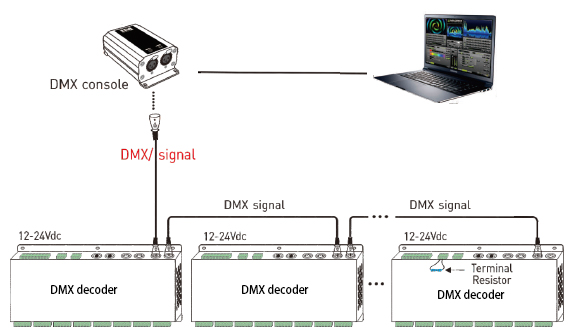
- One RGB led strip connection.
Choose an RGB LED strip controller
Every RGB LED strip needs a controller between the strip and the power supply. Pick one by how you want to control the colors:
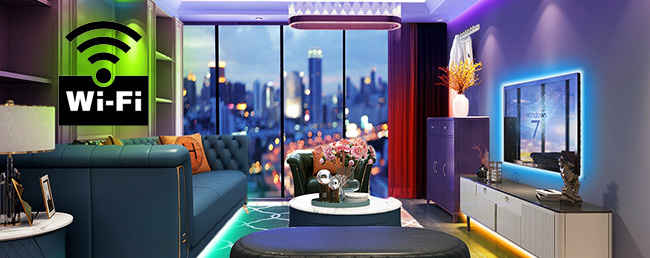 WiFi RGB controllersPhone app, voice assistants
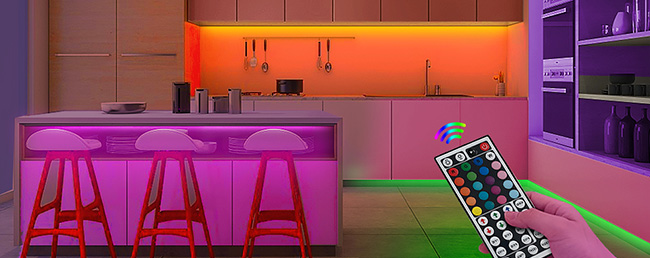 RF remote RGB controllersHandheld remote, multi-zone
 IR remote RGB control boxesSimple, low-cost remote
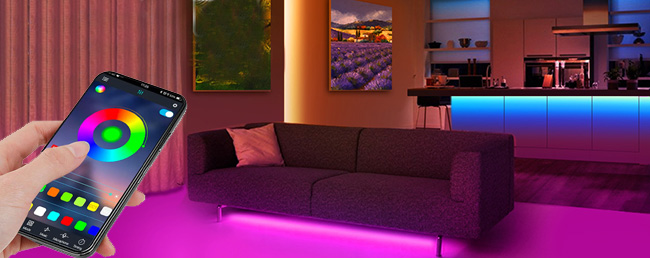 Bluetooth RGB controllersPhone control without WiFi
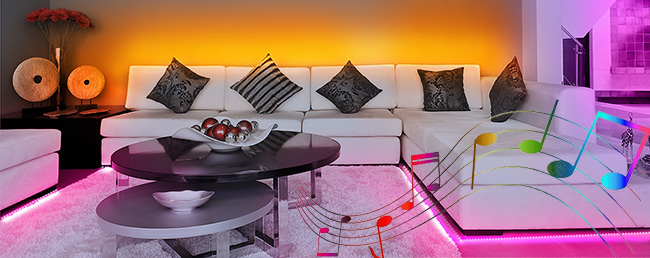 RGB music controllersColors that follow the music
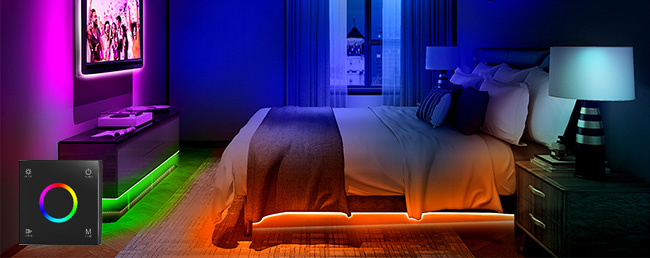 Wall mount RGB controllersA panel on the wall like a switch
 DMX512 RGB controllersStage and commercial lighting
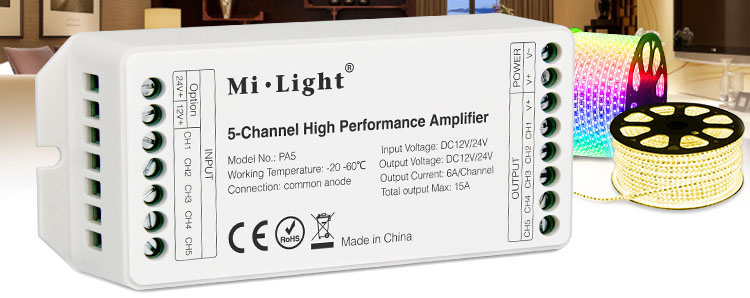 RGB LED strip amplifiersExtend a run past 5 m
RGB LED strip wiring FAQ
How many wires does an RGB LED strip have?
Four: one common positive (V+) and three negatives for red, green and blue.
Which wire is positive when I connect the RGB controller to the power supply?
The red wire is positive and the black wire is negative. Do not reverse the polarity.
How long can an RGB LED strip run?
A standard RGB reel is 5 m (16.4 ft). For longer runs use a constant current RGB strip (up to 30 m without voltage drop), RGB amplifiers, RF controllers that sync, or DMX decoders.
Why won't my RGB lights light up?
Usually the positive and negative wires are reversed, or an LED pin on the strip has a poor contact.
How big should the power supply and controller be?
The RGB strip should use no more than 80% of the rated power of the controller and the power supply.
Related reading: How to wire single color led strip lights?
Parts for wiring an RGB LED strip
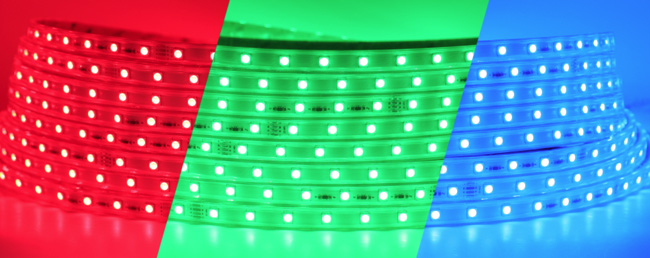 RGB flexible LED strip lights12V and 24V RGB reels
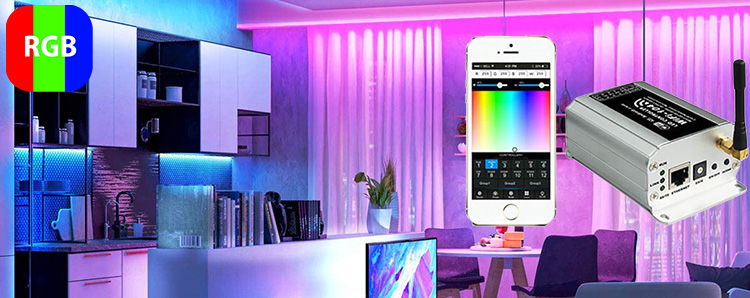 Color change RGB controllersWiFi, RF, IR, music, DMX
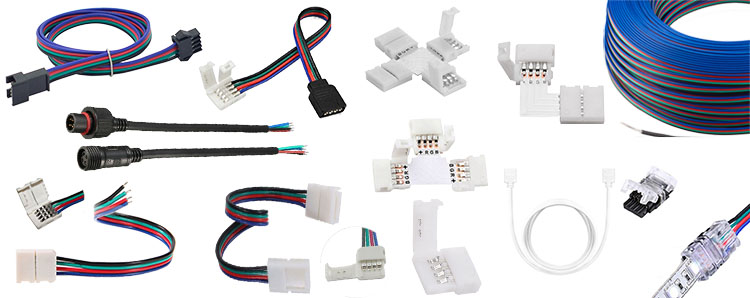 4-pin RGB LED strip partsConnectors, extension and splitter cables
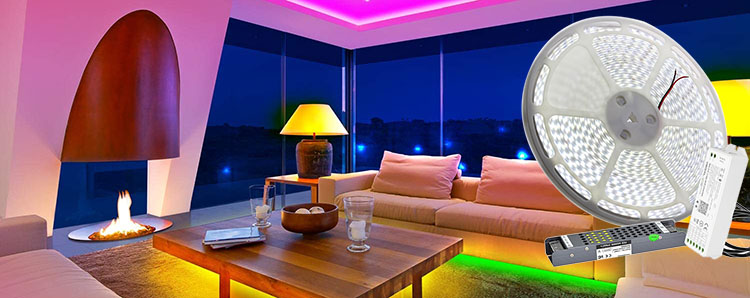 Multi-color LED strip kitsStrip, controller and supply in one box
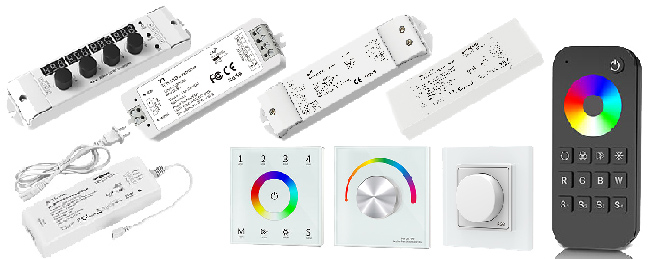 RF RGB control systemControllers that sync across zones
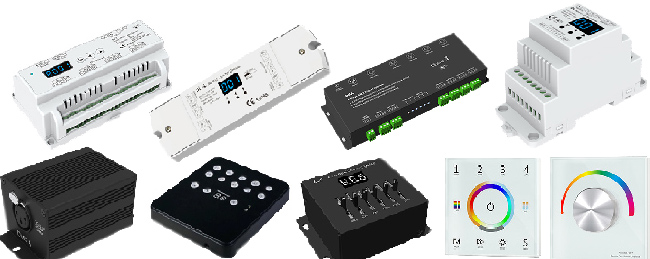 DMX512 seriesDecoders and masters for big projects
Send us your run length and how you want to control it, and the SuperLightingLED team will put together the strip, controller and power supply for you. Custom lengths and voltages can be made to order. Contact our team